
How to build a staging server with Docker, Jenkins and Traefik
~ Chapter 2 ~Preparing the server
This guide is largely outdated at this point. You should instead consider installing Jenkins on Kubernetes with Helm.
Let’s install requirements and configure the server to get the desired staging stack.
Across the examples featured in this guide, you are expected to replace placeholder values with your own, such as your_domain.
You must also be able to connect to your server using SSH using an account with elevated permissions to run the commands listed in the article.
I am using an entry level CentOS box off of Google Compute Engine with the sole purpose of hosting the staging swarm and CI/CD stack, but any Linux machine should work fine. In fact, it may run better on Ubuntu/Debian.
DNS records
For this setup to work, you need 3 different DNS entries plus a wildcard sub-domain pointing to the IP of the server on which everything will be installed. I have chosen the following for my proposed solution:
- jenkins.your_domain.com : Will point to Jenkins’ UI
- docker-registry.your_domain.com : Will point to the private Docker Registry
- swarm.your_domain.com : Will point to Portainer’s UI
- *.swarm.your_domain.com : Will point to dynamically staged containers
Installing Docker
There are multiple ways to install Docker CE, as explained in their documentation. I generally chose to run their convenience script which happens to be very convenient indeed:
$ curl -fsSL get.docker.com -o get-docker.sh
$ sudo sh get-docker.sh
$ sudo usermod -aG docker $USER
The last two commands will be adding your user to the docker group and allow you to run Docker commands without having to be root. You may have to log out and log back in so that the group changes are applied to your user.
You can prove that this step has worked by running the generic Hello World container. If Docker has correctly been configured, you should see the container’s default output message.
$ docker run hello-world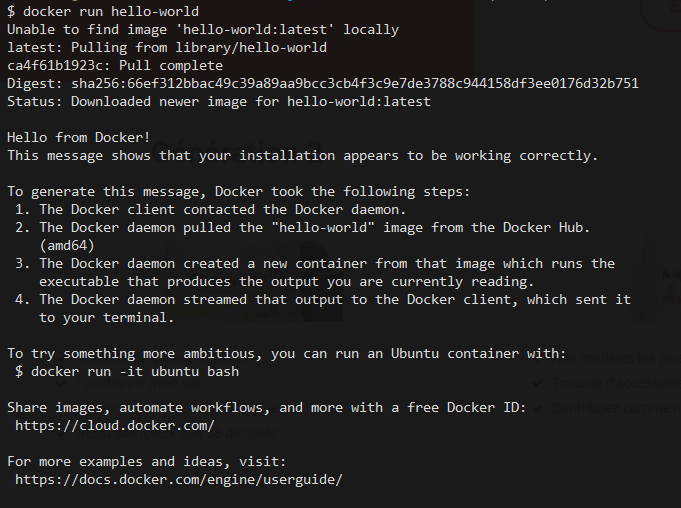 Great success!
Installing Docker Compose
Docker Compose also needs to be installed on the host to complement Docker. Again, by following the official documentation, you can download and configure the binary on the server.
(Version 1.21.2 is very likely outdated by the time you read this. I suggest you double-check with the official commands instead of pasting my values)
$ sudo curl -L https://github.com/docker/compose/releases/download/1.21.2/docker-compose-`uname -s`-`uname -m` -o /usr/local/bin/docker-compose
$ sudo chmod +x /usr/local/bin/docker-compose
Create mounted directories
Containers will mount volumes that will allow them to load configuration files and maintain their own reusable file caches. We need to create a list of paths on the server for that purpose.
Feel free to change the paths to something custom to your setup, but be aware that these paths will be reused later on within our stack’s docker-compose.yml configuration file and you will need to update them there as well.
You will likely require elevated rights to run these commands. If that is the case you may have to use su or prefix with sudo depending on your OS.
$ mkdir -p /opt/data/traefik/
$ touch /opt/data/traefik/acme.json
$ mkdir -p /opt/data/portainer
$ mkdir -p /opt/data/jenkins/volume-caches/build-cache/composer
$ mkdir -p /opt/data/jenkins/volume-caches/build-cache/node/npm
$ mkdir -p /opt/data/jenkins/volume-caches/build-cache/node/gyp
$ mkdir -p /opt/data/jenkins/volume-caches/build-cache/node/cache
$ mkdir -p /opt/data/jenkins/volume-caches/build-cache/node/config
$ mkdir -p /opt/data/jenkins/volume-caches/build-cache/bower/local
$ mkdir -p /opt/data/persistent-cache
Injecting a custom toolset
It may be useful for you to mount a collection of commonly used helper scripts into your build containers. For example, the repetitive process of compressing a build result into a tarball can be abstracted into a shell script which, in turn, can be mounted inside the build containers where it can be invoked during builds.
The obvious advantage is that if you change something in that script, all the jobs will reflect that change instantly.
I have created a git repository that holds many of such helpers scripts that I have cloned in my user’s home directory under /home/your_user/dev-ops. I feel you should do something similar as well and will therefore reference this path when configuring the stack.
Configuring Traefik
The Traefik container requires a global default configuration file to be mounted when it is run. Create a file called traefik.toml under /opt/data/traefik which contains the following. Be aware of the multiple values you would need to customize for your use case.
defaultEntryPoints = ["http", "https"]
logLevel = "ERROR"

# Entrypoints, http and https
[entryPoints]
  # http should be redirected to https
  [entryPoints.http]
  address = ":80"
    [entryPoints.http.redirect]
    entryPoint = "https"

  # https is the default
  [entryPoints.https]
  address = ":443"
  [entryPoints.https.tls]

# Enable ACME (Let's Encrypt): automatic SSL
[acme]
# Email address used for registration
email = "your_email"
storage = "acme.json"
entryPoint = "https"
OnHostRule = true

[acme.httpChallenge]
entryPoint = "http"

# Enable Docker configuration backend
[docker]
endpoint = "unix:///var/run/docker.sock"
domain = "swarm.your_domain"
watch = true
exposedbydefault = true
Fixing permissions
The set of required permissions gets messy because of all the moving parts. By convention, Jenkins folders and files mounted in the container must have permissions set to 1000:1000. On the other hand, Docker will require all folders it writes to be owned by root while being completely opened nonetheless because of the different users used inside the build containers. Finally, Traefik’s acme.json file, used to store https certificates information, needs to only be readable by root.
Most controversially though, is that the Docker socket mounted into the Jenkins container must have looser permissions that what is usually uses.
All of these rules translate to :
$ chown -R 1000:1000 /opt/data/jenkins
$ chown -R 1000:1000 /home/your_user/dev-ops
$ chown -R root:root /opt/data/jenkins/volume-caches
$ chmod 777 -R /opt/data/jenkins/volume-caches
$ chown root:root -R /opt/data/portainer
$ chown root:root -R /opt/data/traefik
$ chmod 600 /opt/data/traefik/acme.json
$ chmod 777 /var/run/docker.sock
Installing services
For the sake of keeping server configuration in one place, I will declare all services within a docker-compose.yml file that will be used to handle the orchestration of the server.
Though I explain it like you are creating these files directly on the server, it’s better to have cloned a repository or for the files to be deployed by Jenkins itself (once it’s running).
Under /home/your_user/dev-ops/server-setup/, create a file called docker-compose.yml containing the following service configurations. Remember to replace the domain names for something you actually desire and to make sure the mounted volume paths work out in your case.
version: '3'
services:

  portainer:
    image: portainer/portainer
    deploy:
      replicas: 1
      update_config:
        parallelism: 1
      restart_policy:
        condition: on-failure
      labels:
        - traefik.port=9000
        - traefik.frontend.rule=Host:swarm.your_domain
        - traefik.frontend.whitelist.sourceRange=your_whitelisted_ips
        - traefik.docker.network=traefik
    volumes:
      - /var/run/docker.sock:/var/run/docker.sock
      - /opt/data/portainer:/data
    networks:
      traefik:

  docker-registry:
    image: registry:2
    deploy:
      replicas: 1
      update_config:
        parallelism: 1
      restart_policy:
        condition: on-failure
      labels:
        - traefik.port=5000
        - traefik.frontend.rule=Host:docker-registry.your_domain
        - traefik.frontend.whitelist.sourceRange=your_whitelisted_ips
        - traefik.docker.network=traefik
    volumes:
      - /opt/data/docker-registry:/var/lib/registry
    networks:
      traefik:

  jenkins:
    image: custom-jenkins:latest
    deploy:
      replicas: 1
      update_config:
        parallelism: 1
      restart_policy:
        condition: on-failure
      labels:
        - traefik.port=8080
        - traefik.frontend.rule=Host:jenkins.your_domain
        - traefik.frontend.whitelist.SourceRange=your_whitelisted_ips
        - traefik.docker.network=traefik
    volumes:
      - /home/{yourUser}/dev-ops:/dev-ops
      - /opt/data/persistent-cache:/persistent-cache
      - /opt/data/jenkins/volume-caches/build-cache/composer:/.composer
      - /opt/data/jenkins/volume-caches/build-cache/composer:/home/docker/.composer
      - /opt/data/jenkins/volume-caches/build-cache/node/npm:/.npm
      - /opt/data/jenkins/volume-caches/build-cache/node/npm:/home/docker/.npm
      - /opt/data/jenkins/volume-caches/build-cache/node/gyp:/.node-gyp
      - /opt/data/jenkins/volume-caches/build-cache/node/cache:/.cache
      - /opt/data/jenkins/volume-caches/build-cache/node/config:/.config
      - /opt/data/jenkins/volume-caches/build-cache/bower/local:/.local
      - /opt/data/jenkins/volume-caches/build-cache/bower/local:/home/docker/.local
      - /opt/data/jenkins:/var/jenkins_home
      - /var/run/docker.sock:/var/run/docker.sock
      - /usr/local/bin/docker-compose:/usr/bin/docker-compose
      - /usr/bin/docker:/usr/bin/docker
    networks:
      traefik:

networks:
  traefik:
    external: true
your_whitelisted_ips will have to be replaced by a coma-separated list of IPs similar to 127.0.0.1, 24.37.71.xx, 104.197.35.xx.
Be wary of which IPs you are whitelisting in this file. You will want to block almost everything while granting access to your public IP, the actual host server and the IPs of incoming webhooks. You may also want to have different values for each service declared.
For example, I had to supply the list of BitBucket webhook IPs to the Jenkins container because that’s where our projects are hosted and BitBucket needs to notify Jenkins of incoming commits.
Custom images
The only image we need a custom build for is the Jenkins image. Our container will need additional apt-get packages which are not on the original container image.
Next to docker-compose.yml, create a directory called jenkins that will contain the new Dockerfile for the Jenkins image.
Before we write the file, we must obtain the group id under which docker is running. The id will need to be added to the Dockerfile and will allow Jenkins’ containers to start sub-containers during builds.
$ mkdir jenkins
$ touch jenkins/Dockerfile
$ echo $(stat -c '%g' /var/run/docker.sock)
Taking note of the value outputted by the last command, edit the Dockerfile so it contains build commands similar to these:
FROM jenkins/jenkins:lts

USER root
RUN apt-get update \
      && apt-get upgrade -y \
      && apt-get install -y sudo libltdl-dev ssh rsync \
      && rm -rf /var/lib/apt/lists/*

RUN echo "jenkins ALL=NOPASSWD: ALL" >> /etc/sudoers

# Fixes socket permissions within build containers
RUN groupadd -for -g docker_group_id docker
RUN usermod -aG docker jenkins

USER jenkins
With the Dockerfile ready, you may build the Jenkins image :
$ docker build -t custom-jenkins:latest jenkinsNetworking and Proxy
The compose file denotes it requires an external traefik network that will be used to route public traffic to the containers hidden from the public ports. Containers that don’t have access to that network will not be accessible from the web through Traefik’s load balancer.
Create this global network by invoking the following from the command line:
$ docker swarm init --advertise-addr=your_ip
$ docker network create --driver=overlay traefik
With the global traefik network ready, launch a global Traefik service.
docker service create \
    --name traefik \
    --constraint=node.role==manager \
    --publish 80:80 --publish 443:443 \
    --mount type=bind,source=/var/run/docker.sock,target=/var/run/docker.sock \
    --mount type=bind,source=/opt/data/traefik/traefik.toml,target=/traefik.toml \
    --mount type=bind,source=/opt/data/traefik/acme.json,target=/acme.json \
    --network traefik \
    traefik \
    --docker \
    --docker.swarmMode \
    --docker.watch \
    --docker.exposedByDefault
Deployment
Once you are ready, bring up the stack using stack deploy and give the stack a name. Here, I have used cicd:
$ docker stack deploy -c docker-compose.yml cicdYou may prove that you have all of these containers running successfully by visiting the different hosts you have configured:
jenkins.your_domainswarm.your_domaindocker-registry.your_domain/v2/
Completing service configuration
You will want to hit all these services and configure them further using their web UI to make them suit your needs. Jenkins is likely going to be the one that requires the most attention as you need to install the Blue Ocean plugin, among various other important settings like the driver that allows syncing with Jira for example.
I won’t go through any of the service configurations in this article, but I am sure you will find their steps to be either self-explanatory or that they might be documented elsewhere better than I could do it here.
Step completion checklist
- Setup DNS configuration
- Added a
docker-compose.ymlfile on a server - Created cache folders and Traefik configuration files with correct permissions
- Successfully invoked
docker stack deploy - Successfully visited the URLs for all services
- Successfully configured the services using their UI
With the stack ready to receive builds, lets write reusable Jenkins jobs for our builds.